If your AI videos are still coming out rigid, glitchy, or just plain wrong, you're not alone. Many creators struggle to get smooth, quality output from image-to-video software, even after they've decided on popular AI platforms. But the truth is, the quality you get depends on much more than just the platform. It's the prep work, the settings, and how well you understand the tech under the hood that makes the difference.
Which AI Video Platform is the Best Quality?
Kling AI is recognized as the quality optimum, primarily due to its superior performance in image-to-video (I2V) spatio-temporal stability and its industry-leading "low jitter" performance. While general generative tools often suffer from high-frequency temporal artifacts where subject features morph between frames, Kling AI’s latest models have reduced common artifacts like warping, morphing, and flickering by approximately 60%.
The determination of Kling AI as a quality leader is supported by its native 1080p resolution and its ability to maintain high frame rates (30 to 48 FPS). In practical I2V scenarios, Kling demonstrates a "physics-aware" nature, ensuring that motions such as walking or fluid dynamics respect inertia and gravity rather than appearing artificial.
Specific Setting Example for Quality Optimization:
- Mode & Resolution: To achieve the "quality optimum," activate Professional Mode to ensure native 1080p output and maximum detail refinement.
- Motion Stability: For a filmic look with minimal jitter, set the Frame Rate to 30 FPS and the Motion Intensity to a moderate level (e.g., 4 or 5). This balances dynamic movement with the platform's advanced frame-to-frame coherence engine.
Why Is Image Preparation So Crucial?
Ensuring High Quality Source Images
Garbage in, garbage out—that rule still applies in AI-generated video.
Your source images need to be:
- Minimum 1024x1024px (preferably 2K and higher)
- Clear, well-lit, and free of compression artifacts
- Stylistically consistent if using multiple images
Don't upscale low-resolution images solely to fulfill size specifications. Rather, work from the highest original quality you possess, or redesign higher-res versions if necessary.
Basic Editing And Improvement Guidelines
One round of pre-editing can make a huge difference:
- Sharpen edges to allow AI to recognize outlines clearly
- Use color correction to even out tones between frames
- Eliminate cluttered backgrounds that can perplex motion creation
- Apply noise reduction for texture smoothing artifacts
These can be completed in Photoshop, GIMP, or even simple mobile applications before ever opening an AI video software.
| Image input | Prompt | Video |
 | Two people hugging each other. |  |
 | The little boy smiles at the camera. |  |
How Do You Optimize AI Video Settings?
Select The Correct Output Options
Each platform has various options for frame rate, resolution, and output format.
For professional-level output:
- Set frame rate at 24fps for filmic look, 30fps for less stutter
- Use MP4 (H.264 or H.265) for the most well-rounded compression and compatibility
- Always use the highest bitrate if possible—this prevents pixelation in motion scenes
Some tools also allow you to set motion weight, subject tracking, or prompt strength. Choose values that stabilize, instead of exaggerate, transitions.
Adjust Parameters For Improved Results
Even slight adjustments can avoid flickering or drifting of the image:
Decrease the randomness or noise level when faces move too much between frames
Use a Fixed Seed for the Same Styling Across Frames
Minimize "camera shake" or motion extrapolation when you're dealing with portraits.
If the software supports "motion guidance" from text or reference videos, apply it with restraint—it is helpful, but excessive use leads to artificial pacing.
How Do You Make AI Video Transitions Look Natural?
Applying Natural Transition Effects
AI may struggle to morph between still images, especially if poses or angles vary.
To smooth transitions:
- Insert intermediate frames manually, with image editing to fill in large pose gaps
- Apply cross-dissolves or fade between scenes during post-editing in order to minimize flicker
- Utilize motion blur overlays or ghosting filters in video editing programs like DaVinci Resolve or Adobe Premiere to replicate real camera motion
These aren't "cheats"—they're normal filmmaking techniques translated to AI workflows.
Avoiding Common Jitter Issues
Jitter usually occurs when the AI is not sure where image components are going next and tries many possibilities.
To minimize:
- Avoid drastic lighting changes or conflicting light sources
- Avoid busy or moving backgrounds
- Utilize sets of images where orientation, scale, and proportions are the same
- Adjust denoising or smoothing sliders if your platform has them
If your video continues to stutter, export at a higher frame rate and downsample later—it provides greater control in final post-editing.
Which Advanced AI Models Should You Implement?
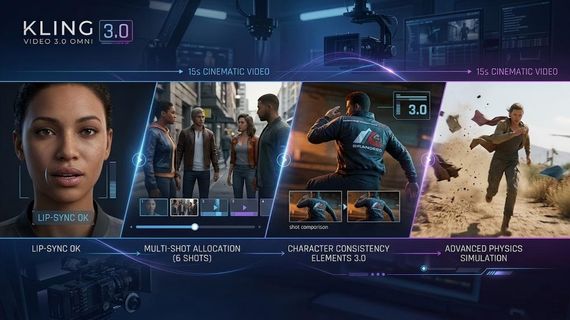
When determining which advanced AI models to implement for a production pipeline, the Kling O1 Video Model and the Kling VIDEO 3.0 series are the primary choices for high-fidelity content. These models provide specialized Character Locking capabilities and Easy Tuning features that simplify the creative workflow.
The implementation advantage lies in the "Elements" system (Reference-to-Video), which acts as a structural anchor. By binding a subject, the model ensures the character's appearance, clothing, and features remain stable even during complex camera movements.
Specific Setting Example for Model Implementation:
- Character Locking: Use the "Elements" feature to upload 1-4 reference images. Select "Bind Subject to Enhance Consistency" to anchor character traits, ensuring they remain clear and stable throughout a 15-second shot.
- Easy Tuning: Utilize the Camera Movement panel to select absolute commands, such as "Master Shot: Move Forward and Zoom Up." Adjust the Displacement Parameter (e.g., set to +6) to control the precise extent of movement without complex promptin
| Image input | Prompt | Video |
 | The athlete is cycling on the highway with a sense of speed. |  |
 | Flying dust and floating clothes. |  |
FAQs
Q1: Why Does The Video Quality Appear Poor Even After Using High-Res Images?
Bad outcomes usually have to do with lurking settings, not image resolution. Compression artifacts, over-aggressive denoising, or miscalibrated prompt strength can all reduce AI video quality. Some websites also downscale on export to fit file size requirements—look for "lossless export" settings or manually bump up your output bitrate. Try not to add style filters after export, as that can decrease crispness even more.
Q2: Why Is There Jitter Or Lag In My AI Video?
Jitter is generally the result of unstable frame interpolation or conflicting visual cues between frames. When your source images differ too greatly in angle, light, or texture, the AI will have a hard time constructing consistent motion. Experiment with reducing the number of frames per second and working with image sequences that adhere to a logical motion path. Certain tools allow you to include motion masks or anchor points—utilize these to stabilize important areas of the frame, such as faces or hands.
Q3: Why Is The Audio Out Of Sync With The AI Video?
AI Image-to-Video software is largely visually driven. When adding an audio post, the mismatch happens due to frame drop, variable render times, or encoding problems. Use professional video editing software to resync the audio track frame by frame. Avoid auto-sync software that uses waveform guesses—they get it wrong. Export video and audio at the same frame rates for perfect sync.
Q4: What Should I Do If Export Time Is Too Long?
Slow rendering times typically equate to your tool being executed on constrained hardware or queued on shared cloud servers.
To accelerate export:
Opt for a lower resolution during testing, and upscale afterward
- Utilize CPU/GPU acceleration options if available on your platform
- Close unnecessary background applications during local renders
- Avoid experimental models and heavy filters on final exports
Paid or premium plans usually open up priority servers—a worthwhile investment if you're dealing with tight deadlines or client deliverables.
Q5: How Do I Prevent Color Shifts Between Frames?
Color shifting occurs if the AI lacks a consistent baseline.
To correct it:
- Utilize the same lighting and contrast across all input images
- Lock white balance settings if using photography equipment
- Avoid using aggressive filters on sets of images
- Post-process your video using LUTs (look-up tables) for a consistent tone
A few AI platforms also provide "style lock" or "tone matching" features—activate these early on to avoid requiring intense post-editing afterward.
Ready To Make Your AI Videos Stand Out?
Enhancing AI Image-to-Video Quality is more about control and less about chance. Equipped with the proper tools, clean source images, intelligent settings, and an understanding of what leads to glitches, you can generate videos that appear smooth, purposeful, and professional.
Begin by tidying up your image inputs. Experiment with Kling AI. Discover how each feature works, and do not overlook the tiny nuances, which usually have the greatest impact.