A great photo edit can change one thing without making the whole image feel different. Finding the best AI photo editor often comes down to how well a tool handles that balance, from quick fixes to bigger creative changes.
Best AI Photo Editors at a Glance
AI photo editors can look similar on the surface, but the experience changes a lot once you start working with prompts, references, and more detailed edits. This table gives you a quick sense of how their editing approaches and workflows differ.
Tool | Best For | How It Edits | Key Strengths | References & Output |
Kling AI | Complex edits with prompts and references | Natural-language prompts + reference images | Object swaps, background changes, pose and expression edits, relighting, and reframing | IMAGE 3.0 supports up to 10 references; IMAGE 3.0 Omni adds native 2K/4K output |
Leonardo AI | Creative refinement | Prompt editing + image guidance | Detail edits, object changes, and style adjustments | Flexible reference and generation controls |
Runway | Image-to-video workflows | Prompts + visual references | Scene changes, restyling, and composition edits | Strong fit for visual and video workflows |
OpenArt | General generative editing | Prompts + targeted tools | Object removal, background swaps, retouching, and lighting edits | Broad editing and generation toolkit |
Dreamina | Localized image edits | Prompts + selection tools | Subject, background, color, and texture changes | Combines local edits with generation |
Adobe Firefly | Adobe-based workflows | Prompts + selections | Generative Fill, removal, background changes, and image expansion | Integrates with Photoshop and Adobe Express |
Higgsfield | Creative visual edits | Prompt-driven tools | Retouching, relighting, object changes, and stylization | Flexible creator-focused workflows |
Fotor | Everyday photo retouching | Preset and AI-assisted editing tools | Retouching, sharpening, background cleanup, and photo restoration | Designed for common photo editing tasks |
What to Consider When Choosing the Best AI Image Editor
A solid AI image editor should make everyday edits easier without creating extra cleanup. The main things to compare are how precisely it follows instructions, what kinds of changes it handles, how well it uses references, and whether the final image fits your intended use.
Editing Precision
Small edits are a good test. Try replacing an outfit, removing someone from the background, or changing a single color. A capable editor should make the requested change while leaving faces, product details, lighting, and nearby areas largely untouched.
Targeted Editing
Features such as object removal, background replacement, inpainting, image expansion, relighting, recoloring, and reframing matter when you only want to fix part of an image. Masks, brush tools, or region-based controls can also help narrow the edit instead of regenerating the whole frame.
Reference Support
References are helpful when words alone are not specific enough. An Image to image workflow can guide the subject, style, setting, or composition using another image. For portraits and product shots, consistency becomes especially important when the edit changes several parts of the scene.
Portrait and Product Edits
The right feature set depends on what you work on most. Portrait editing may involve retouching, expression or pose changes, outfit swaps, and new backgrounds. Product images may need restaging, material changes, cleaner lighting, or a different crop or angle.
Output Options
Resolution, aspect ratios, cropping, upscaling, and export quality all affect where the finished image can be used. Social posts, e-commerce listings, ad creative, and print assets can have very different requirements.
If you also create new visuals from scratch, Text-to-Image is a useful extra. For a photo editor, though, the core value still comes from how well it improves or transforms the image you already have.
Which AI Photo Editor Is Best for Your Needs?
Once you know what you want to change, choosing an editor gets much easier. The tools below are selected as representative examples rather than an exhaustive list or a strict division of features. Many capabilities overlap across platforms, and these examples simply highlight different approaches to photo-editing jobs, from small touch-ups to more involved changes to the subject, setting, or composition.
Kling IMAGE 3.0 itself supports a broad range of editing needs, including object and background changes, pose and expression adjustments, relighting, material edits, reframing, and camera-angle changes. The tools below help illustrate how different AI photo editors approach particular workflows.
Kling AI for Flexible, Reference-Guided Photo Editing
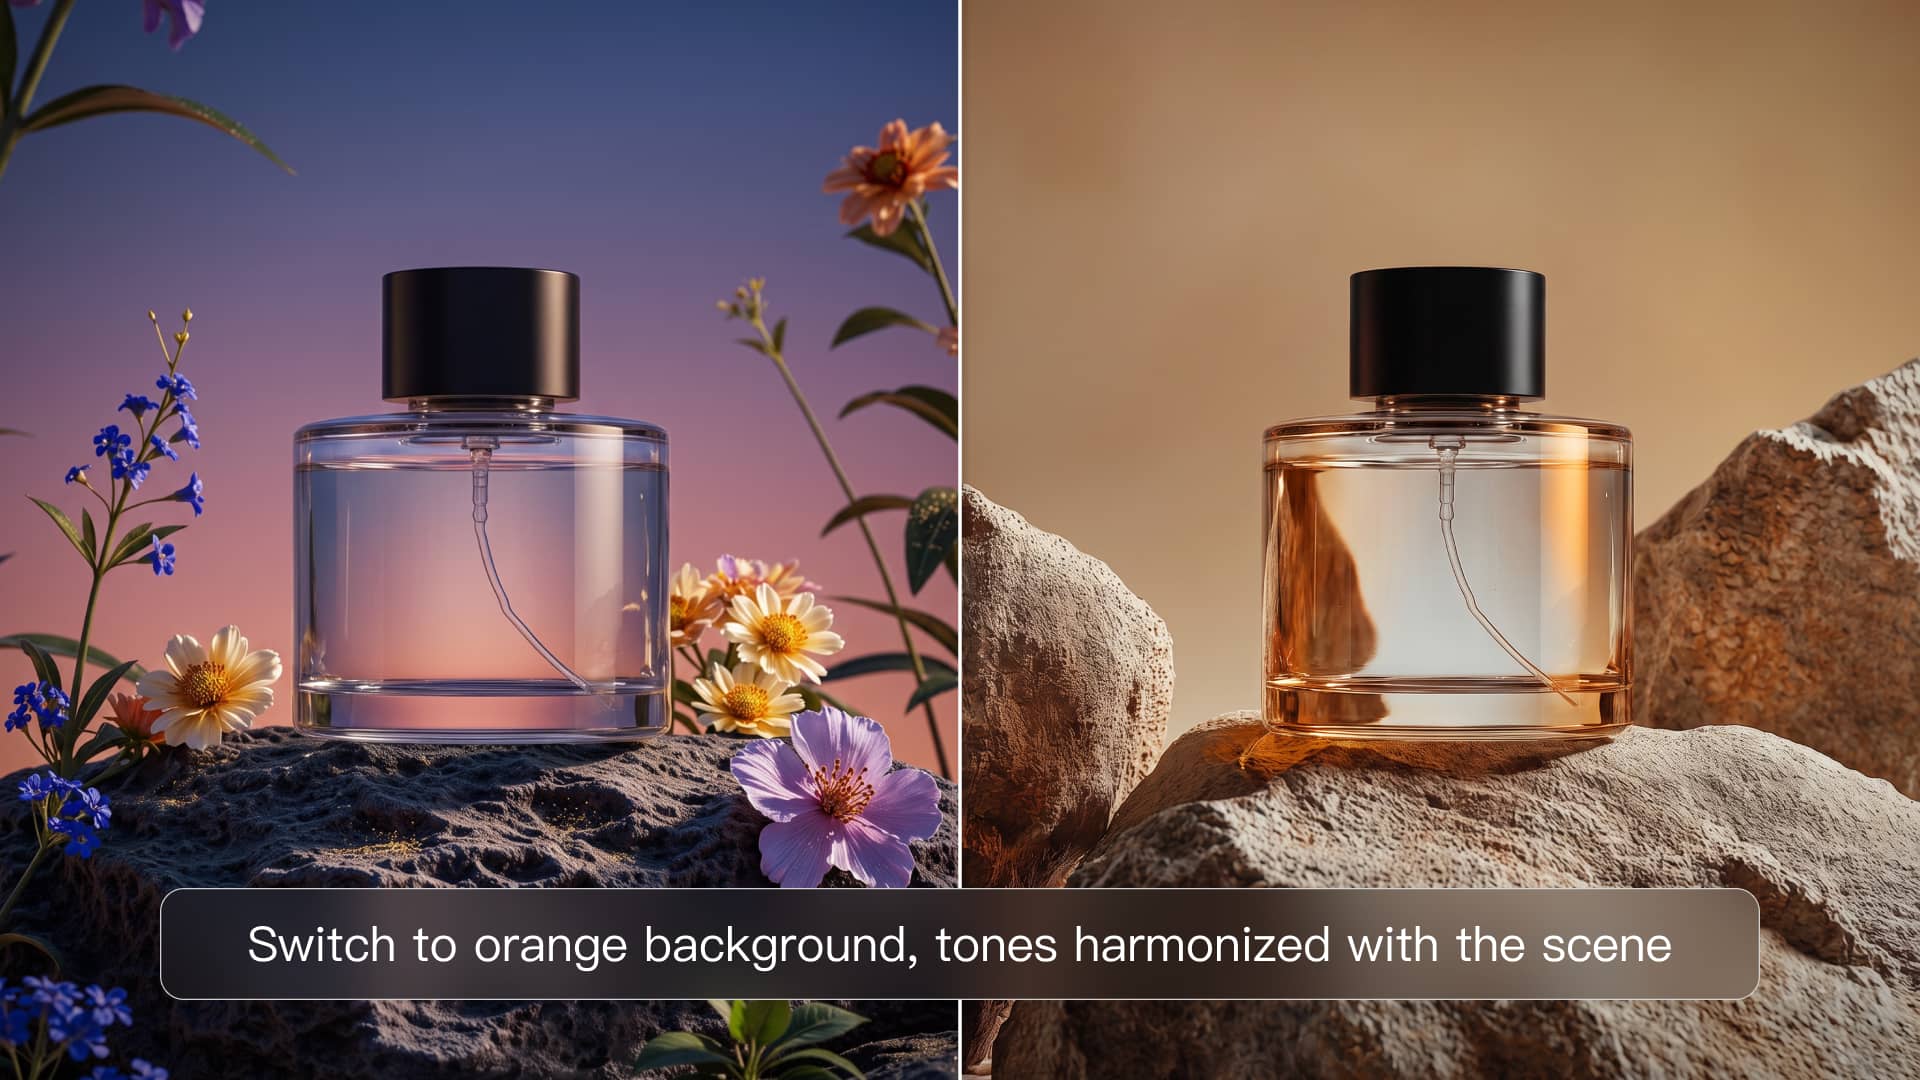
Kling AI is especially useful when an existing photo needs more than a basic cleanup. With Kling IMAGE 3.0, you can describe edits in natural language to add, remove, or replace objects, change backgrounds, adjust a portrait’s outfit, pose, or expression, restage products in new settings, and refine lighting, colors, materials, framing, or camera angles. Rather than rebuilding the entire image for every change, IMAGE 3.0 is designed to preserve important details from the original, including the subject, overall style, lighting, and texture, so targeted edits can blend more naturally with the rest of the scene. When a prompt alone is not enough, the model can draw features from up to 10 reference images, letting you bring together details such as a person, outfit, product, background, composition, or visual style while helping key subjects remain recognizable. IMAGE 3.0 supports output up to 2K, while IMAGE 3.0 Omni extends the workflow with native 2K/4K output for projects that require higher-resolution results. Precise Detail Modification
Reference Image | Generated Image 1 | Generated Image 2 |
.webp?x-oss-process=image/resize,w_1872) | .webp?x-oss-process=image/resize,w_1872) | .webp?x-oss-process=image/resize,w_1872) |
| Prompt: Make the cat smaller. | Prompt: Change the blue cup to a red one. |
Expression Modification
Reference Image | Generated Image Laugh | Generated Image Glaring |
.webp?x-oss-process=image/resize,w_1872) | .webp?x-oss-process=image/resize,w_1872) | .webp?x-oss-process=image/resize,w_1872) |
Prompt: Change the expression to laugh / glare. | ||
Leonardo AI for Iterative Photo Refinement
Leonardo AI fits images that need several rounds of adjustment rather than one major transformation. You can remove or replace objects, refine details, adjust lighting, and keep iterating on the same image with prompts and image guidance. Its Custom Relight and upscaling tools also make it practical for polishing a shot before export.
Dreamina for Precise Regional Image Editing
Dreamina is useful when you want to control exactly where an edit happens. Point selection, lasso tools, sketch guidance, and regional controls let you isolate clothing, backgrounds, objects, or other details while keeping surrounding areas largely unchanged.
Adobe Firefly for Image Expansion and Reframing
Firefly is especially practical when an existing image needs to fit a different layout. Generative Expand can extend the frame for new aspect ratios, while Fill and Remove handle additions, replacements, and unwanted content without requiring a full rebuild.
Fotor for Portrait Retouching and Photo Restoration
Fotor is geared toward familiar photo fixes that do not require a complicated workflow. Its tools cover skin retouching, blemish removal, sharpening, object and background cleanup, plus restoration for faded, scratched, or blurry older photos.
How to Edit a Photo With Kling IMAGE 3.0
Kling IMAGE 3.0 works best when you start with a usable source image, give the edit a clear target, and refine only what still needs attention. Here’s a practical three-step workflow.
1.Start With the Right Photo and References
Upload the highest-quality version of the photo you have. Clear faces, product edges, textures, and lighting give IMAGE 3.0 more visual information to work with.
Add reference images only when they add something the source photo does not already provide. For example, a portrait reference can help maintain a person’s appearance, while a style reference can guide the overall visual treatment. IMAGE 3.0 can draw features from up to 10 reference images, though a smaller, focused set is usually easier to manage for a single edit. For a straightforward cleanup or color change, the original photo may be all you need.
2.Make the Edit Specific
A clear editing prompt should cover four things: the subject you want to change, the exact change you want, the details that need to stay the same, and how the edit should fit the original scene.
For example, call out whether the face, pose, background, framing, lighting, shadows, or overall color tone should remain unchanged. If the edit affects clothing, materials, or an object, it also helps to specify the new color, texture, or finish you want.
| Prompt Example: Replace the jacket with a black leather jacket. Keep the face, hairstyle, pose, background, and lighting consistent with the original. |
3.Inspect the Result Before You Use It
Review the edited image at full size and compare it with the original. For portraits, pay attention to facial features, hair, hands, clothing edges, and skin texture. For product shots, check the shape, logos, materials, reflections, and shadows.
Also look at how well the edited area blends with the rest of the image. Lighting direction, perspective, edge quality, and background continuity can make the difference between an edit that feels natural and one that looks noticeably generated. If those details hold up, the image is ready for export or further use.
Reference Image | Generated Image |
.webp?x-oss-process=image/resize,w_1872) | .webp?x-oss-process=image/resize,w_1872) |
Prompt: Enlarge the cup in a girl’s hand, making it enormous, with her holding it with both hands. | |
The End
The best AI photo editor depends on what you need to change. Kling IMAGE 3.0 fits portrait and product edits such as background swaps, outfit or material changes, pose and expression adjustments, relighting, and reframing, with reference support and up to 2K output. For projects that require higher-resolution results, IMAGE 3.0 Omni extends the workflow with native 2K/4K output.
What Is the Difference Between an AI Picture Editor and an AI Photo Editor?
The terms often overlap, but an AI photo editor is usually focused on editing existing photographs, while an AI picture editor can also cover illustrations, graphics, and other image types. With Kling AI, both workflows can use text prompts and reference images to change specific parts of an existing image, such as the background, lighting, materials, or subject details.
Will an AI Photo Editor Change My Face?
It can, especially when the edit also changes the pose, camera angle, lighting, or overall style. With Kling IMAGE 3.0, using a clear portrait reference and stating which facial features should stay recognizable can help reduce unwanted changes. For identity-sensitive edits, always review the face closely rather than assuming it will stay identical.
How Does AI Rebuild the Background After Removal?
When Kling IMAGE 3.0 removes an object or person, it generatively reconstructs the cleared area based on the surrounding visual context. The edited area is designed to remain visually consistent with the surrounding background, lighting, texture, and scene details. Complex patterns, reflections, or large removed areas may still need extra review.
Can I Use an AI Photo Editor for Free?
Yes. Kling AI offers free credits to new users after sign-up, which can be used to try its image and video generation features. Credit amounts, validity, model access, and available features may change, so check the current editor and membership details before generating.
Can an AI Photo Editor Remove Objects From a Photo?
Yes. With Kling IMAGE 3.0, you can identify the person, object, sign, text, or other distraction you want removed in a text prompt. If several similar items appear in the shot, describe the target by its position, color, clothing, or nearby objects. Kling then removes it and reconstructs the covered area using the surrounding scene as context.