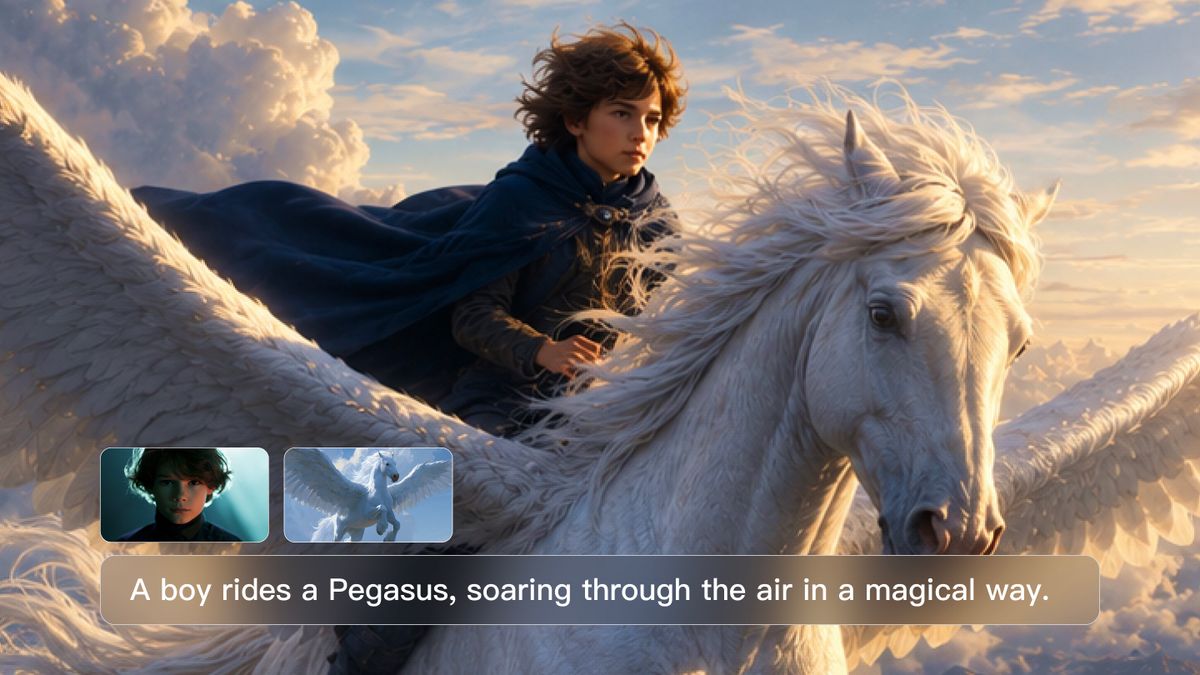
How can I make an animation video without a studio, or years of editing experience? Start with an idea. With Kling Video 3.0 Omni, a short prompt or a single image can be enough to set it in motion. This guide explores what counts as animation, walks you through the creative process, and shows how to turn a simple concept into a polished animated clip.
What Counts as an Animation Video?
Animation videos go far beyond cartoons. It might be a 2D or 3D scene built from a prompt, a still image set in motion, or a short sequence of animated graphics. Animation videos can start from text, still images, or other visual references, depending on how you want to build the scene. Kling Video 3.0 Omni brings these creative paths into a single workspace, so you can stay with the idea instead of switching between tools.
The look begins with the words you choose. “Flat 2D animation, bold outlines, soft cel shading” leads in one direction. “Soft clay figures, rounded edges, studio lighting” leads in another. A few precise visual details give the model a clearer world to build.
Video |
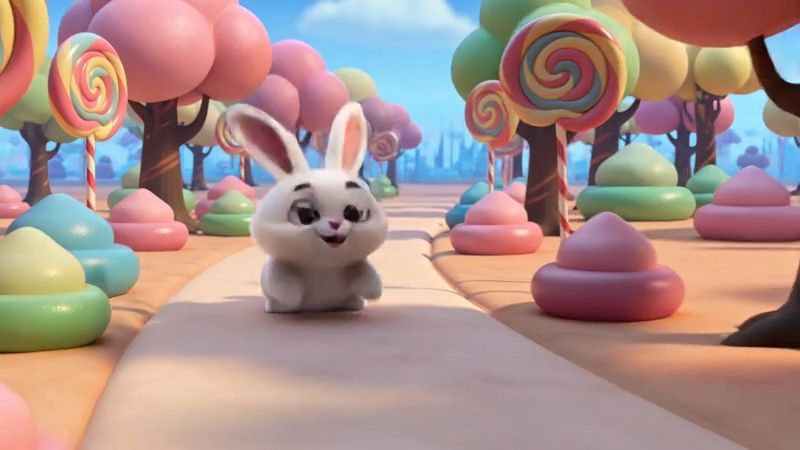  |
| Prompt: Cute 3D cartoon animation style, an original cheerful cartoon bunny character with big eyes hopping through a magical candy forest with lollipop trees and gumdrop bushes, bright colourful whimsical world, soft playful lighting, gentle bouncy camera, charming children's animation. |
How Can I Make an Animation Video: Step by Step
A good animation starts before anything moves. Give the idea a shape, choose the right starting point, then build the scene one clear decision at a time. Here is a practical workflow for taking a concept from first line to finished clip.
Step 1: Plan Your Story and Prepare Your Assets
Start with one moment you want to bring to life. Decide who appears, what happens, and how the scene ends. Keep the action manageable for the clip’s duration. If your idea needs several scenes, break it into short shots and note what each should show.
Gather any materials you already have, such as a character illustration, product image, or setting reference. If the animation needs to begin or end with a specific composition, prepare those images too. Note any dialogue or sound you want to include.
Step 2: Choose Your Starting Point and Add References
Open Kling Video 3.0 Omni and choose how to begin:
Start from text: If you don’t have a reference image, describe the scene you want to create.
Start from an image: Upload an illustration, product image, or character design, then describe how it should move.
Use start and end frames: If you need a particular opening and closing image, use start and end frames to guide the transition. Upload both images, choosing similar subjects and settings to help the movement between them feel natural.
For recurring characters or objects, add suitable images or use Element Reference to help preserve their appearance. Prepare a character element with a voice if your workflow calls for the same voice across scenes.
Text instructions and reference materials work together to guide the result. Give each reference a clear purpose, such as defining the character’s appearance, the setting, or the visual style.
Step 3: Write a Complete Prompt
Use your prompt to explain what happens in the scene, how it should look, and what the audience should hear. Bring these details together before generating:
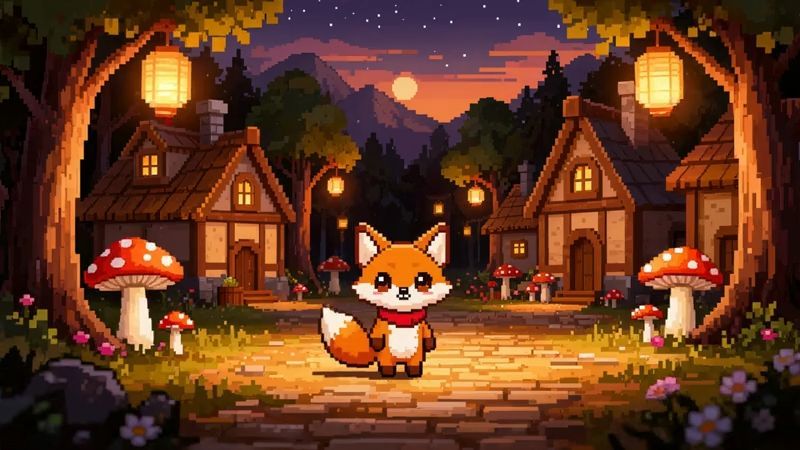
Subject: Identify the main character or object and the features that matter, such as the little fox in your pixel-art village image. If you uploaded a reference, make clear which subject it represents.
Action: Describe what the subject does in a simple sequence. “The fox gently bobs in place and sways its tail” gives clearer direction than “animate the fox.” Describe any surrounding movement you want, such as flickering lanterns or drifting fireflies.
Setting: Establish where and when the action takes place. Include relevant surroundings, such as a village with paper lanterns, red mushrooms, and falling leaves. When using a reference image, keep the setting consistent with what it shows.
Style and atmosphere: Name the animation style, then describe the lighting and mood that support it. Crisp pixel art, warm lantern light, and gentle movement can give the scene a quiet, cozy feel. Add camera direction where it matters; a fixed camera helps keep the composition steady for an ambient animation.
Audio: Enable Native Audio if you want sound generated with the video. Specify who speaks, the exact words, and how they are delivered. Describe sound effects tied to visible actions and ambient sounds that establish the setting, such as leaves rustling in a light breeze. If the scene needs no dialogue, say so; you don’t need to add speech to every animation. For multiple speakers, keep each character’s name, dialogue, and delivery note together.
If you use Custom Multi-Shot, organize the prompt by shot and specify the action, duration, framing, camera angle, and camera movement for each shot. Leave enough time for movements and spoken lines to finish naturally. Let's look at this small, pixelated picture of a fox. We will turn it into an enjoyable and soothing animated video:
Image |
.png?x-oss-process=image/resize,w_1872) |
| Prompt: Animate the little fox in the reference image while preserving the village composition and crisp, clean 16-bit pixel-art style. The fox gently bobs in place and sways its tail. Paper lanterns flicker with a warm glow, fireflies drift through the air, a few leaves fall softly, and the red mushrooms sway slightly. Keep the camera fixed and all movement subtle, creating a quiet, cozy ambient animation. Add soft wind and gentle leaf rustling in the background. No dialogue. |
Video |
 |
Step 4: Generate, Review, and Export
Choose the available duration, aspect ratio, and resolution that fit your project, then generate the clip.
Watch for character changes, awkward movement, rushed dialogue, and abrupt transitions. If something needs work, adjust one detail at a time. For example, simplify a complicated action or shorten a line that doesn’t fit the shot.
For a longer sequence, continue the scene with Extend with Prompts where available for your selected workflow, or generate additional clips to assemble in the other video editor.
Once you’re happy with the picture and sound, download the finished clip and share it.
Tips for Better Animation
Better animation often begins with a few thoughtful choices before you create. As an animated video creator, you have plenty of room to follow your artistic instincts. A few practical techniques can take that creativity further. They can reduce repeated generations and bring each clip closer to the result you imagined. Put these tips into practice, then bring your next idea to life.
- Give the scene one clear focus. A short clip works best with one main subject, one central action, and one camera idea. Leave enough space for the moment to unfold.
- Write what the camera can see. Words like “beautiful” or “dramatic” leave room for guesswork. Describe visible details instead: the direction of movement, the pace of an action, the framing, and the light.
- Match the idea to the available time. A short clip can carry one complete story beat, but not an entire plot. If the scene feels crowded, divide it into smaller moments and give each one a clear purpose.
- Refine without starting over. When the result is close, keep what already works. Adjust one detail at a time, such as the motion, timing, framing, or delivery, and see what changes.
When the scene feels focused and the direction is clear, create animation and review the result with fresh eyes.
The End
So, how can I make an animation video that looks finished? Start from text or an image, describe the style and motion clearly, lock your characters with references, and let the model handle the rest. Kling Video 3.0 Omni brings multimodal input, consistent characters, native audio, and shot-by-shot control into one animation workflow. Pick a starting point and generate your first animated clip today.
FAQs
Can I Turn a Photo into an Animation?
Yes. Image-to-video animates a still you already have, which is ideal when a character or design is set. Upload the picture, describe the motion you want, and Kling Video 3.0 Omni adds movement while keeping the subject recognizable. This is a quick way to bring artwork, product shots, or character designs to life without redrawing anything or rebuilding the scene from scratch.
How Much Does a 2-Minute Animated Video Cost?
The cost varies. Since Kling VIDEO 3.0 Omni supports up to 15 seconds in a single generation, a two-minute animation will require multiple generated clips or an extended workflow. Credit usage can vary based on the selected workflow, video duration, resolution, audio settings, input type, and the number of iterations you create. Check the current generation panel and pricing information before you begin, as credit requirements and feature access may change.
What Is the Best App to Make Animation Videos?
The best app depends on how you want to create. Kling Video 3.0 Omni is a strong choice when you want to turn text or images into animation, keep characters recognizable, add Native Audio, or plan multiple shots in one generation. Traditional animation software may suit frame-by-frame control better, while an AI animation maker offers a faster path from an idea to a finished clip.
Do I Need Animation Skills to Make Animated Videos?
No. The point of an AI animation generator is that a clear description replaces manual frame-by-frame. If you can write what you want to see, name the style, and point to a reference image, you can produce an animated clip. Kling Video 3.0 Omni handles the motion, consistency, and rendering, so the skill that matters most is writing a specific, well-structured prompt.
How Long Can an AI Animation Video Be?
It depends on the model. Many tools cap at a few seconds. Kling Video 3.0 Omni supports up to 15 seconds of continuous, multi-shot video in a single generation, with smooth transitions between shots. That is enough for a short story beat or a social clip. For longer pieces, you can generate several sequences and combine them while keeping your characters consistent.
Can I Add Voices to My Animation?
Yes. Kling Video 3.0 Omni supports Native Audio, producing dialogue, ambiance, and lip movement in a single pass. With Voice-Driven Characters, you can bind a voice to an element so an animated character sounds the same across scenes. Placing spoken lines in quotation marks tells the model exactly what a character should say, keeping the voice aligned with the on-screen action.