Start with text-to-image to design the key frames. Then use image-to-video to animate those frames. This gives you a repeatable AI Image to Video Workflow. You can create a video from AI image sequences with clear motion, steady pacing, and clean sound. The result looks polished without a large crew or long timelines.
What Is An AI Image To Video Workflow And Why Use It?
An AI Image To Video Workflow turns words into moving shots. You write a prompt, generate still images, add motion, and export in the format your platform needs. It lets you create a video from AI image frames with control over look, pacing, and camera feel. Use it to cut costs, move faster, test more ideas, keep a consistent style, and publish more often. Solo creators and small teams gain studio-level polish without a big crew, while larger teams use it to pre-visualize and reduce reshoots.
Core Stages
The pipeline flows in a clear order: ideation and visual references, text-to-image key frames for each shot, image-to-video passes that add movement and timing, quality checks for stability, color, and artifacts, then edit, sound, and delivery.
Benefits And Use Cases
This workflow shines for trailers, ads, social posts, explainers, music visuals, pitch videos, pre-viz, and mood films. You can explore style safely before a live shoot, prove concepts quickly, and align clients on tone and pacing.
Inputs And Outputs
Inputs include prompts, seed values, reference images, brand rules, camera notes, and music cues. Outputs include short clips, scene assemblies, and masters in vertical, square, or horizontal formats using platform-ready codecs, with optional captions and clean or texted versions.
Model And Tool Selection
Keep the stack lean: one text-to-image model to set style, one image-to-video engine to add motion, one upscaler or interpolator to lift resolution and smooth cadence, and one audio tool to clean dialogue and balance music and SFX. Start simple, change tools only when you hit a clear limit, and save seeds and settings so winning looks are easy to repeat.
| Image Input | Video |
 | 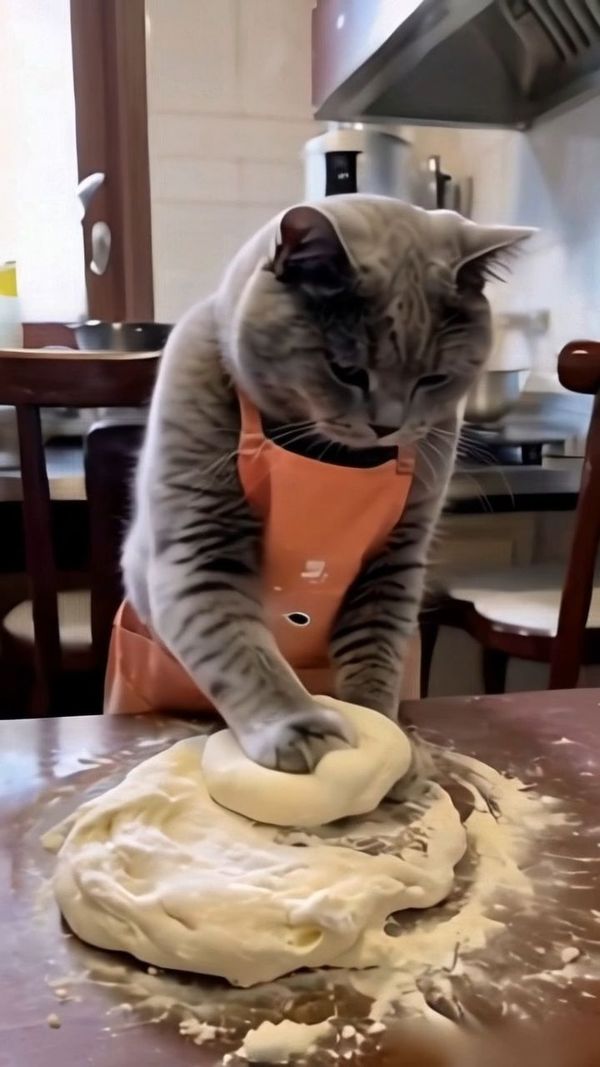 |
How Do You Plan An AI Image To Video Workflow From Concept To Shot List?
Start with a plan you can follow under pressure. A tight brief, a clear shot list, and clean file hygiene will make your AI Image To Video Workflow faster to build and easier to scale as you create video from AI image assets.
Concept Brief And Style Guide
Keep it to one page. State goal, target platform, and run time in plain English. Define tone, palette, lens feel, and camera mood (handheld or steady) with a few concrete words. This brief becomes your north star when prompts drift or feedback conflicts, and it keeps everyone using the same visual language from day one.
Shot List And Storybeat Map
Translate the brief into a short shot list. Give each shot a one-line purpose, intended framing, and motion idea, and order them by emotional beat rather than strict chronology. Note the line of action and any planned transitions so key frames cut together cleanly once you animate them.
Visual References And Mood Boards
Gather six to ten strong references that match your brief. For faces, include front, three-quarter, and side angles under similar lighting to stabilize identity. Add environment and prop cues plus a few lighting references. A tight board reduces prompt iterations and lowers the risk of flicker or color shifts when motion is added.
Asset And File Organization
Lock aspect ratio early (9:16, 1:1, or 16:9) and stick to it across all shots. Use consistent names like P01_S003_v02_seed742.png, and separate folders for references, prompts, key frames, motion clips, and exports. Version any asset you plan to reuse, and keep a simple log of seeds and key settings. This saves hours during revisions, makes handoffs painless, and lets you scale the project without breaking the look.
| Image Input | Video |
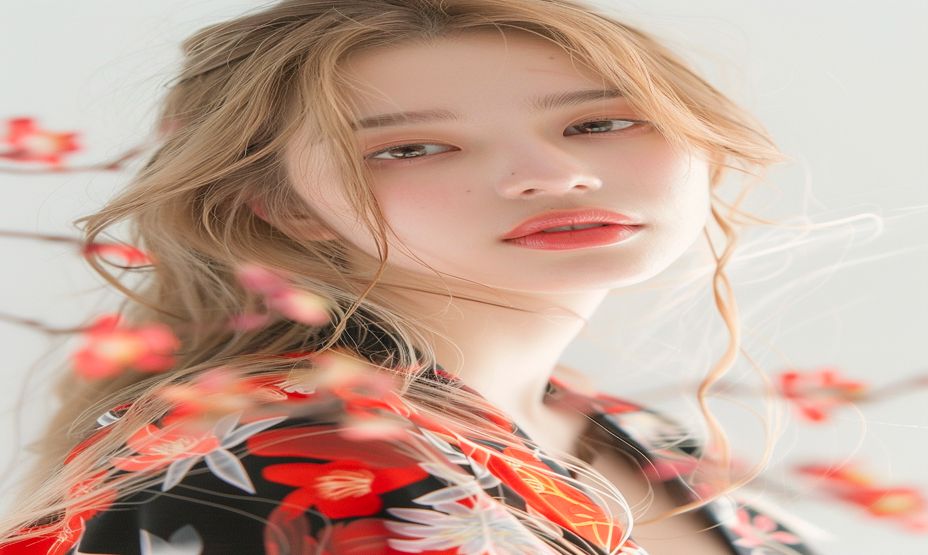 | 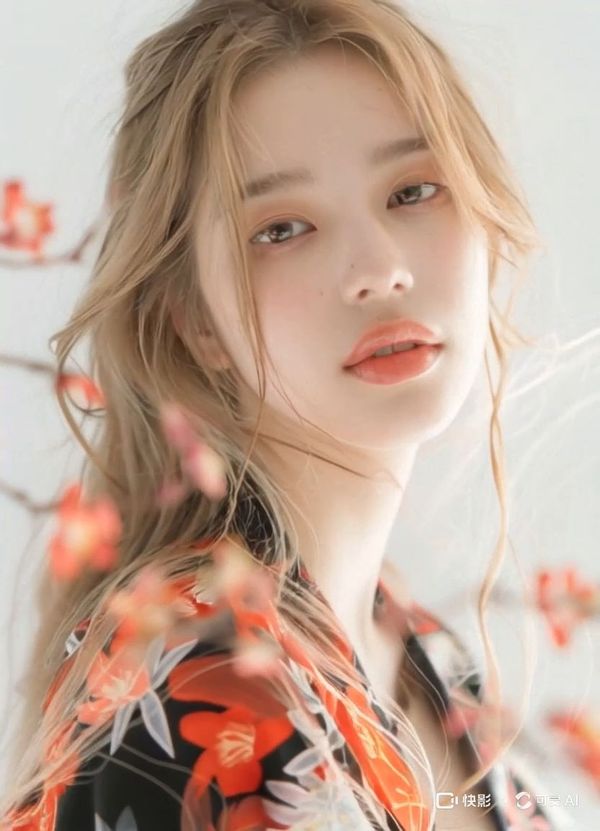 |
Which Models And Tools Fit An AI Image To Video Workflow?
To maintain a professional edge, your tech stack should revolve around a "Central Engine" rather than a collection of fragmented tools. By positioning Kling AI as your primary hub, you achieve structural consistency and maximize output efficiency. Other tools should only serve as specialized supplements for pre-production or final polishing.
Why Kling AI is the Primary Engine
Unlike parallel options that require constant "prompt-slotting," Kling AI acts as an end-to-end studio center. The following table highlights why it leads in production-ready metrics.
Category | Tool/Brand | Core Role | Style Consistency | I2V Success Rate | Rework Frequency |
Core I2V Engine | Kling AI | Primary Workflow Hub | Ultra-High (Element Library) | ≥90% (Unified O1/3.0) | Minimal |
T2I Reference | Midjourney | Pre-production Stills | High (Static only) | N/A | N/A |
Niche Alternate | RunwayML | Pro Effects / Brushes | Medium | ≈40−60% | High |
Niche Alternate | Pika Labs | Rapid Prototyping | Medium | ≈30−50% | High |
Mastering | Topaz Video AI | Post-production Polish | N/A | N/A | Minimal |
Audio | Adobe Audition | Final Sound Mix | N/A | N/A | Minimal |
Short Recommendations
1. The Locked "Kling-First" Stack Establish your pipeline with Kling AI as the master engine to handle both style inheritance and complex motion.
2. Beginner-Friendly: The All-in-One Path For the fastest turnaround, stay entirely within the Kling ecosystem. Kling 3.0 and O1 models allow you to generate 4K images, animate them with native audio, and use "Multi-Shot" features to output cinematic sequences in a single click. This removes the "consistency gap" that occurs when moving assets between different brands.
3. Efficiency & Success Rate: Locking the Look To reduce rework, leverage Kling’s Element Library. Uploading multi-angle reference images allows the AI to "remember" your character, prop, or scene traits just like a human director. This ensures that your success rate from keyframe to final video remains near-perfect, even during complex camera moves or high-difficulty actions.
4. Advanced Motion Control When consistency is non-negotiable, use Kling VIDEO 2.6/3.0 Motion Control. Instead of relying on random AI movement, upload a 3-30 second reference video to "force" the character to mimic specific actions and expressions perfectly. This targeted control reduces the gacha-style generation luck and ensures a studio-ready master on the first or second render.
How Do You Create a Video From an AI Image With a Consistent Style And Prompts?
Consistency makes a one-person pipeline feel like a studio. Lock the look once, then reuse it across shots so you create a video from an AI image without drift.
Step 1: Character Sheets & Reference Kit
Write core traits once: hair, eyes, skin tone, age range, body type, signature clothing, and style notes. Add HEX values for key colors and three face angles (front/¾/side) under similar light. Include one hero frame per location and a simple “Do/Don’t” row (e.g., “warm key light / no harsh rim”). Export as a one-page PDF and keep the images in a /refs folder for every project.
Step 2: Base Prompt & Camera Template
Use a fixed order so models parse the same way every time:
[Character] + [Pose/Action] + [Environment] + [Camera/Lens] + [Lighting/Color] + [Style/Quality] + [Timing].
Reserve a slot for motion cues that will carry into the image-to-video stage: “35mm lens, shallow depth of field, slow dolly in, 6-second move.” Keep wording stable (pick “brown” or “brunette,” not both). Save the prompt as a template you duplicate per shot.
Step 3: Negative Prompt & Quality Guardrails
Maintain a living “never list” to block common failures: no beard, no glasses, no asymmetry, no extra fingers, no warped hands, no color shift, no watermark, no over-sharpening. Add scene-specific guards (e.g., “no motion blur” for product macro). Version the list (v1.2, v1.3) and reference it in each prompt doc so every render uses the same quality bar.
Step 4: Seed, Variations & A/B Logging
Fix a seed for your baseline look. For variants, nudge seed/noise strength slightly and change one variable at a time (camera, lighting, or style token). Log settings in the filename (P01_S003_v03_seed742.png) and a lightweight CSV with columns like shot, seed, cfg, steps, lens, and lighting. Use 2-up A/B boards to compare quickly. Save winners to a “golden samples” folder with notes on why they worked.
Step 5: Reusable Style Package & Handoff
Bundle everything into a portable kit: the one-page look bible, prompt templates, negative list, reference images, golden samples, LUT, and export presets. Place them under a consistent structure (/brief, /prompts, /refs, /samples, /exports). Add a short README with lens choices, preferred framing terms, and aspect ratio rules. Share the kit with collaborators so every shot in your AI Image To Video Workflow starts from the same, locked style.
How Do You Create a Video From an AI Image With Smooth Motion And Quality Control?
Motion sells the shot. Quality keeps viewers watching. Use the steps below to avoid jitter, flicker, and color jumps and to make delivery painless in your AI Image to Video Workflow as you create a video from AI image clips.
Step 1: Resolution, Aspect Ratio, And Frame Rate
Pick specs for the destination and lock them early. Use 1080×1920/30fps for vertical social, 3840×2160/24fps for cinematic work, and 60fps for high-motion recaps or gameplay. Keep the same aspect ratio across all shots to protect composition and avoid late reframing. Match shutter feel by keeping motion blur consistent across scenes.
Step 2: Keyframes, Timing, And Interpolation
Design a clean start and end frame per shot. Match the light, palette, and lens so the style stays fixed. Set a clear duration (e.g., 4–6 seconds) and intended cadence. Use an interpolator to generate in-betweens from those frames. First render a low-quality draft to judge cadence; if it feels “soapy,” shorten step length, reduce smoothing, or add micro-jitter only where needed.
Step 3: Stabilization And Shot-To-Shot Consistency
Stabilize tracking and push-in shots to cap rotation and translation. Reuse the same smoothing values within a scene so the feel does not jump between cuts. Group related shots and lock lens choice, camera height, and move speed. Reuse the same LUT and lighting preset. These small locks make the sequence feel like one place and time.
Step 4: Color, LUTs, And Export Profiles
Work in a single color space (e.g., Rec. 709). Apply one master LUT project-wide, then do light secondaries for skin and contrast on hero frames. Create three export profiles: Draft (low bitrate for quick checks), Review (medium for team notes), and Master (high for delivery). Define codec and container per platform so uploads do not trigger extra transcoding.
Step 5: Artifact Detection And Cleanup
Scan every shot for ghosting, shimmer, edge tears, banding, and warped hands or props. Fix with small, targeted tools: de-flicker, denoise, deband, or a micro re-render of the problem region. Avoid aggressive sharpening that adds halos. If an issue repeats, update your negative prompts or reference kit before regenerating.
Step 6: Drafts, Checklists, Reviews, And Delivery
Use a short checklist: pacing, motion smoothness, safe margins, logo and subtitle placement, audio sync, and peaks/loudness. Review on both phone and desktop at native resolution. Only then export a review cut. After notes, output the master and platform-ready versions (right aspect ratio, frame rate, and bitrate). Keep a tiny slate or filename overlay on drafts for easy tracking.
Step 7: Archive And Version Control
Save project files, golden samples, LUTs, seeds, and export presets. Use clear version names so you can roll back or reuse next month (P01_S003_v05_master.mov). Store a simple JSON/CSV of key settings per shot. Good archiving is the fastest path to consistent updates and painless scale.
| Image Input | Video |
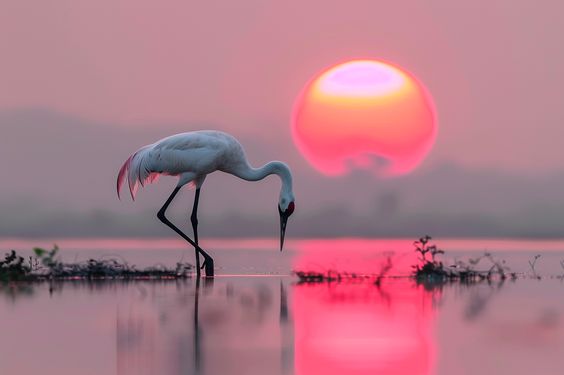 |  |
FAQs about AI Image to Video
Q1. How Long Does It Take To Build a Working Pipeline?
Most creators get a basic AI Image to Video Workflow running in a weekend. The longest part is style locking and seed tuning. Plan three phases: one day for references and key frames, one day for motion tests, and one day for cleanup and delivery templates. Expect a few retakes in week one. After that, you reuse your assets and speed up. A two-minute social cut can move from idea to master in a few days with a small team.
Q2. Do I Need a Powerful Computer To Create a Video From an AI Image?
Not at first. Many image-to-video engines run in the cloud, so your laptop is fine. You mainly need a stable internet connection and enough local space for exports. If you choose local models, a GPU with at least 12 GB VRAM helps. Start in the cloud, learn the flow, then invest if it renders block your schedule. Keep your cache and proxies on a fast drive. That alone can save hours.
Q3. How Do I Collaborate With a Team Without Losing Consistency?
Treat your assets like a mini style system. Share a bundle with the character sheet, prompt template, negative list, references, LUT, and export presets. Use the same file names and folder structure. Assign one person as “style lead” to approve golden samples. Run short reviews with a checklist. This keeps everyone aligned. It also lets freelancers jump in without breaking the look.
Q4. What if Platforms Compress My Video and Ruin Detail?
Design for compression. Use a slightly higher bitrate in the master. Avoid tiny patterns that shimmer after upload. Keep edges clean. Export at the platform’s native aspect ratio and frame rate. Do a test upload on a private post, then adjust. A small de-shimmer or sharpen pass after the upscale can help. So, noise can be shaped at a low level to hide banding.
Q5. Can I Mix Live-Action Footage With My AI Clips?
Yes, but plan it early. Match lens, camera height, and light direction. Create a look LUT for both sources. Shoot a simple gray card for reference. Keep motion in the same speed range so cuts feel natural. Do a quick comp test before you commit to a long sequence. If it blends at draft quality, it will hold at master quality with proper grading.
Start Your AI Image To Video Workflow Today
Pick one lean stack and timebox your pilot. Draft a one-page brief with goal, platform, run time, and look notes. Generate 3–5 hero frames from text-to-image, then convert them to 4–6 second motion clips. Do a quick stability and color pass, add a music bed and light SFX, export to the platform’s native aspect ratio, and post a short cut. Log your seeds, save winning prompts, and note what broke. Tomorrow, tighten wording, reuse your “golden” frames, and iterate a second cut. Repeat this loop weekly, and you’ll build a reliable AI Image to Video Workflow you can scale. Your audience gets steady, on-brand stories; you create videos from AI images faster each round.